
When is next LTS release? 1.8 or 2.0?
This means that if we deploy a website on Joomla! version 1.7 we'll need to keep in mind that after about six months no new security fixes are released.
If you’re the administrator of many Joomla! sites this can have a big impact. Joomla 1.5 will be supported until april 2012 as it is marked as an LTS release. You should ask yourself before upgrading to Joomla! 1.7 (or version 1.6 of course) if there are any features in it that you really need.
And if you decide to upgrade to version 1.7 (or any other non LTS release) you should be aware that after approximately six months you probably need to upgrade.
How to Enable Joomla SEF URLs on GoDaddy Hosting
Enabling Joomla SEF URLs while using GoDaddy requires a few extra steps. GoDaddy has its own unique configuration that can leave many new Joomla users puzzled. If you search the Joomla support forum, you'll find a lot of GoDaddy customers that can't get Joomla SEF URLs configured properly. This post will show you step-by-step how to enable Joomla SEF URLs on GoDaddy hosting accounts.
1.) Log in to your Joomla Administrator account and navigate to the Global Configuration section. There you will see your SEO Settings. Change them to look like this:

2.) Log in to your GoDaddy hosting account:

3.) Launch the Hosting Control Center by clicking on the green arrow:

4.) Launch the GoDaddy File Manager:

5.) Open the htaccess.txt file that was included with the original Joomla files and remove the # before RewriteBase /. Then, copy all of the text to your clipboard.

6.) Within the GoDaddy File Manager click on the New icon:

7.) Paste the text from the htaccess.txt file that you copied to your clipboard in step 5, and click save. Name the file .htaccess, and click Ok.

That's it! Your Joomla SEF URLs should now be working properly on your GoDaddy hosting account. So, what did we do differently? First, GoDaddy requires the RewriteBase to be set in the .htaccess file. Second, you cannot upload the .htaccess file via FTP, or rename the htaccess.txt file to .htaccess like you can with other hosts. You have to create the .htaccess file using GoDaddy's File Manager.
And, now your Joomla website has Search Engine Friendly URLs.
How to Enable Joomla SEF URLs on GoDaddy HostingHow To Install Joomla on GoDaddy Host | Hot Joomla Blog
GoDaddy.com is #1 domain registrar and one of the most popular web hosting providers worldwide.
Their prices are very competitive and you don't have to sign up long-term contracts. We experimented with this hosting provider for some time. Based on our experiences, we can say that GoDaddy Linux hosting packages are 100% compatible with Joomla.
GoDaddy also have a way to install Joomla quickly for your hosting account. We will explain the procedure here in all possible details.
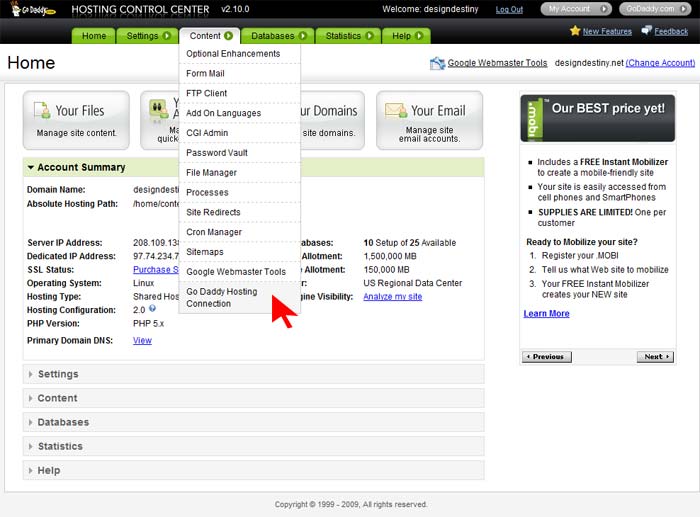
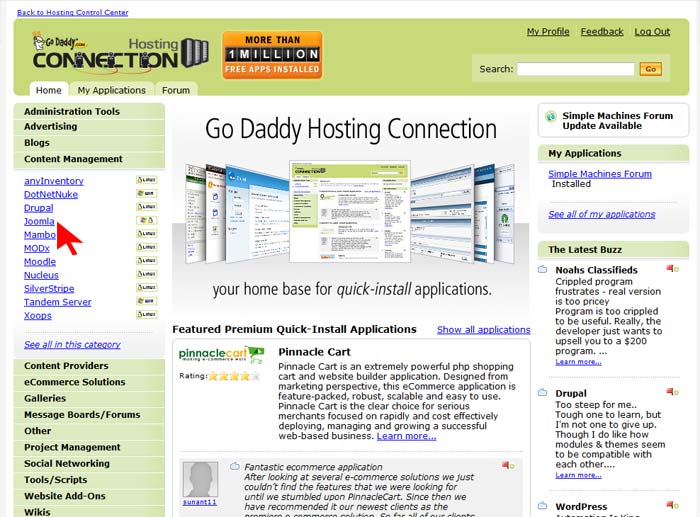
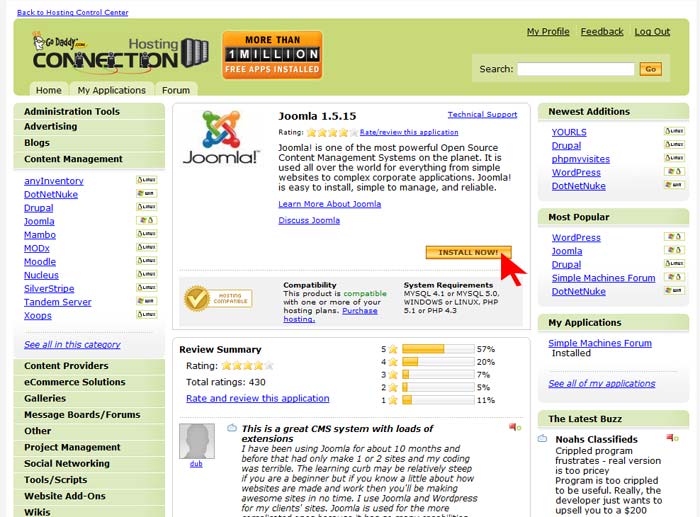
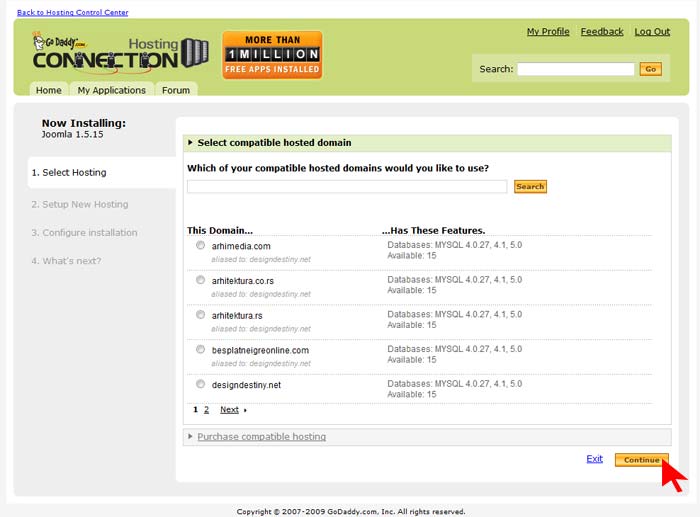
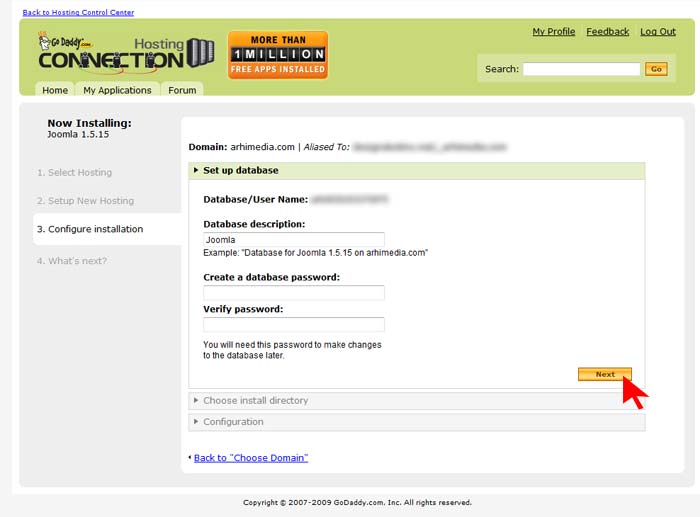
a) Set up database: GoDaddy automatically created database for you and assigned an user with the same name to it. So, you should only enter database pasword twice under this tab. Keep in mind that your password must be 7-14 characters long and have at least one uppercase letter, one lowercase letter and one number.
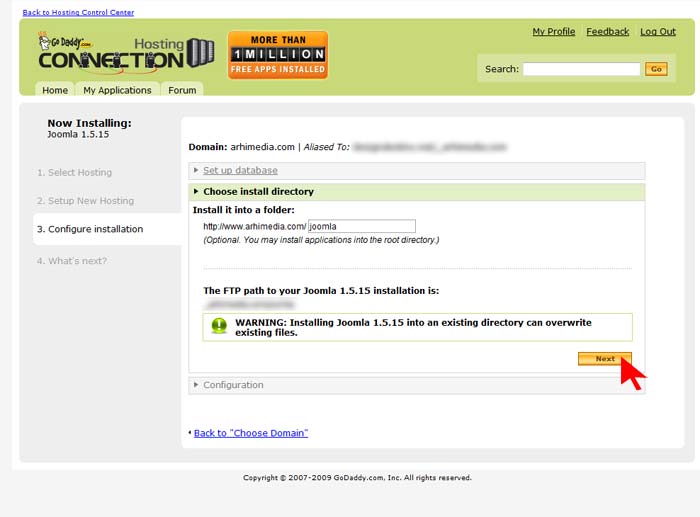
b) Choose install directory: Decide whether to install Joomla in a subdirectory on in the root. If you want to install in the root, leave this field empty, otherwise type subdirectory name. If you already have Joomla installed in the selected directory, it may be overwritten. Proceed by click on the Next button.
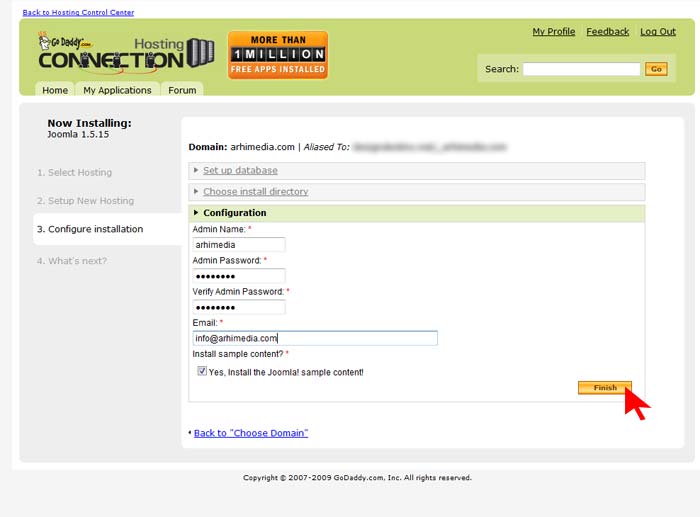
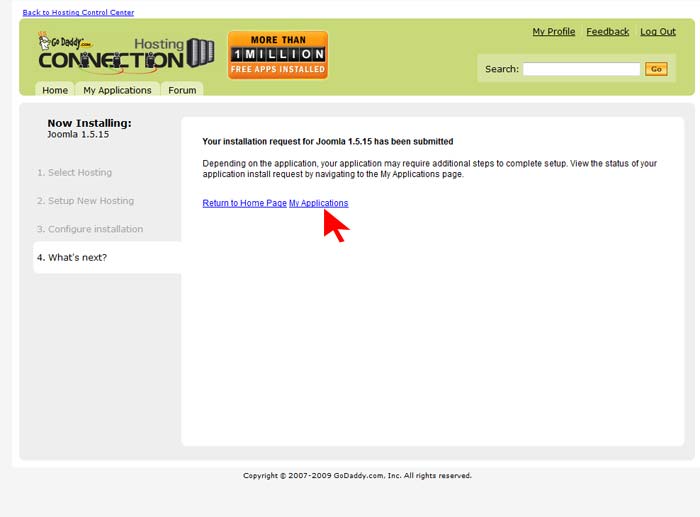
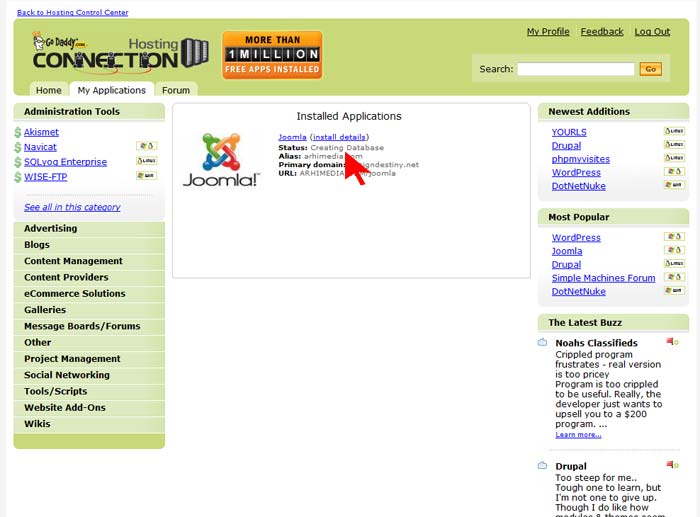
Once the status is marked as Installed, you can check your Joomla frontpage on www.yourdomain.com/joomla_directory and login to the Joomla backend panel on www.yourdomain.com/joomla_directory/administrator using superadministator's username and password that you set on Step 6c.
Thanks to Hot Joomla for this guide
How To Install Joomla on GoDaddy Host by Hot Joomla
Joomla! version 1.6.0 is available
As of 10 January 2011, Joomla! version 1.6.0 is available. This is a production version of Joomla.
The most up-to-date version of the source code can be found in the Subversion repository at:
http://joomlacode.org/svn/joomla/development/trunk
Articles About 1.6
The following list is a collection of project and community articles about Joomla 1.6.
Joomla 1.6 February Update (with videos)
Joomla Developer Conference 2009 Videos
A preview of link redirection in Joomla 1.6
A preview of the new template manager in Joomla 1.6
Access control tutorial for Joomla 1.6
Joomla 1.6 usability improvements
Introducing the new permissions in Joomla 1.6
Joomla 1.6
Joomla 1.6.0 scheduled for release 10 January 2011
Joomla 1.6 is the next generation of Joomla, the most popular Open Source Content Management System in the world. This page tells you about the status of development and where you can download files.
The broad goals of Joomla 1.6 are to:
- implement an expanded access control system;
- implement a nested categories solution;
- and standardise the way extensions are built using the MVC framework.
Joomla 1.6.0 scheduled for release 10 January 2011
Joomla! • View topic - GoDaddy "Free Hosting" Account and Joomla Install Now Works!
Well; needless to say, I was persistent in finding out why, and was able to finally complete a successful, and stable install onto my web space by uploading the core Joomla 1.5.9 release files which contain some minor ".css" modifications wherewith said modifications do nothing more than act as a method of disabling the "" object that GoDaddy injects into all resulting client side code.
GoDaddy MySQL 5.0 Database Setup:
AN IMPORTANT NOTE HERE: DO NOT ASSUME THAT FOR EVERY MYSQL DATABASE YOU SETUP UNDER YOUR GODADDY ACCOUNT THAT THE IP ADDRESS AND HOST NAME WILL BE THE SAME. THAT IS WHY IT IS VERY IMPORTANT TO KNOW WHAT IP AND HOST NAME YOUR DATABASE WILL BE ASSIGNED TO.
The (1st) first thing to do is setup your database at “GoDaddy” here: https://idp.godaddy.com/login.aspx?SPKey=GDMYAEB04&redirect=false&myaurl=%2fProducts%2fAccountList.aspx&ci=9008&product=hosting
Then (2) log in to your account using your GoDaddy account number or account name and password.

Then (3) Click upon the "Manage Account" link for the domain name you wish to set the database up on.

Then (4) click upon the dropdown for databases..

Then (5) click upon the “MySQL” icon.

Then (6) click upon the “Create Database” button near the
top – right of the page.

Then (7) click upon the radio button to select MySQL Version 5.0, then enter the description, database name and password. Write down this information (; you will need it for your Joomla! “configuration.php” file), then click upon the “OK” button.
Note: The “Database Name” and the “User Name” are the same when Joomla! logs on to the database.

Then (8) you will see a screen like this stating that your database is “Pending Setup”.

Then (9) (; after periodically refreshing [ F5 ] key) click upon the “Open Manager” link as shown. This will take you to the “phpMyAdmin” web interface in a new browser window.

Then (10) log in to the “phpMyAdmin” database manager using your
database [DatabaseName] and [password].

Then (11) focus your attention upon the following area of the resulting page –
(; after log in) and be sure the settings as indicated are the same.

Then (12) we must determine “GoDaddy’s” host name for the server that your new database resides – upon because we cannot use an IP address in the “configuration.php” file.
To determine the host name for your database, we must copy the IP address (; yours may be different than shown) and paste it into a “DOS” or “Command Prompt” window. (; If you’d like, you could just write the IP address down, and type it in by hand).

Then (13) open a “DOS prompt” window and type “ pathping [ space ] “, then [ right – click ] the “ DOS Window Title Bar ”, select “ Edit “, then “ Paste “ to insert the copied IP address from the previous step. Now press [ Enter ] on the keyboard.

Then (14) after having pressed [enter] in the previous step, “pathping“ will determine the number of hops it takes to get to the “GoDaddy” server your database resides upon and will resolve the IP address you entered into a host name.

Then (15) we need to copy the “Host Name“ and paste it into “Notepad“ for future reference when setting up our Joomla! “configuration.php“ file.

Then (16) with the left mouse button; click, hold, and drag to highlight the host name as shown above.


Now paste the host name into your favorite text editor and save this file. Now your Database is setup and you should have recorded the database information as shown. Ignore the "ftp" information for now but if you know it, put it in.

Tomorrow, we will unpack our Joomla! ver-1.5.9 files onto our P.C., do some modifications and upload everything to your GoDaddy web space.
Joomla! • View topic - GoDaddy "Free Hosting" Account and Joomla Install Now Works!: "- Sent using Google Toolbar"